Making generic earthworks
The Cerignola game stuff is nearing completion; even the last of the Gendarme types are almost finished. One job I was not looking forward to, was making 12" of earthworks to add to the ones I already have. Making them is not a problem, as they are easy enough to construct. But, I'm adding them to ones I've had for a while and I have to make the old and new blend in. This is never easy: I tend to use cheaply bought (heavily discounted) artists acrylics and odds and sods household emulsions for terrain, and when used up it gets replaced with something similar but, not usually the same.
Anyway, I have taken a few shots of my 'generic earthworks' to show how I made them. They are easy to construct and they are also quite cheap - which puts them into the scope of most gamers.
Firstly, making 12" of earthwork seemed a bit silly. Earthworks are so quick and simple to construct that you might as well make a batch of pieces. I had 16 resin gabions in the locker, so I laid them out next to a tape measure and worked out the length of earthwork I could manufacture from them. It worked out at 36 inches (3 'long' sections).
This is a lot of earthwork for 16 gabions - but I cheat the cost.
After gluing the gabions back towards one edge (see pic above), singly and in pairs, to a strip of 2mm MDF (35mm wide), I cheat the cost by gluing a piece of card in the space between the gabions.
Note: The wide side of the MDF strip will be the front of the earthwork and the narrow side will be the back (defender's) side.
Note: Each strip starts and ends with a gabion. They make the section joins 'disappear'.
To the back (defender's) side of the card I stick horizontally laid lengths of wooded barbecue skewers. (I cut the skewer to length with wire snips). Then I add some vertical 'holding posts'. This is where the cost savings are made - wooden skewers and card are as cheap as chips and look perfectly acceptable as 'barricade' when finished.
At this point I undercoated everything with dark brown artists acrylic.
Next I added the 'earth' to the front of the breastwork. For this I used terracotta Daz modelling clay. It air drys, doesn't shrink much (hardly at all), is strong and durable when set, and is cheap - I used half a 500g pack that I picked up, from ebay, for £3 including postage for this job.
Once dry I used PVA to texture the clay with sand and grit.
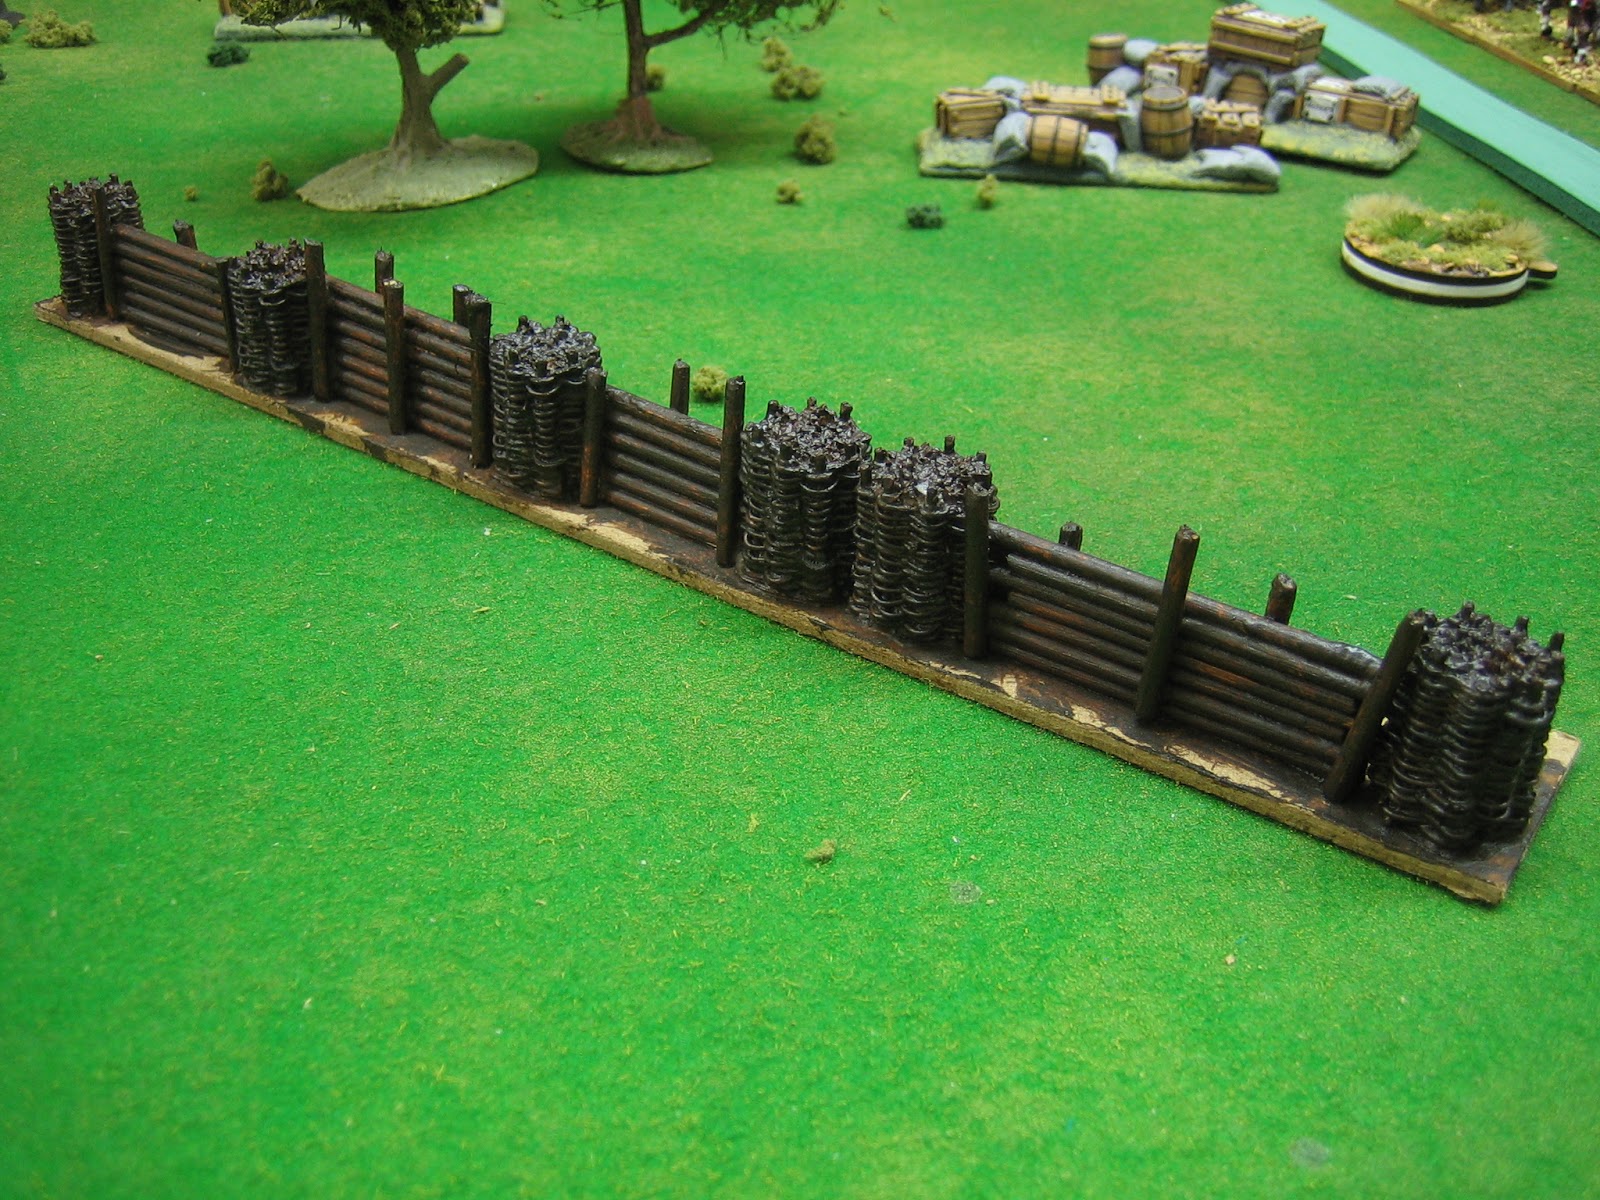
 Then I painted the lot with acrylics, acrylic ink, and household emulsions. I added a few patches of flock for more texture and colour - Bob's your uncle, 3 foot of generic 16th to mid 19th Century earthworks.
Getting them to match with the old sections - 8 out of 10? Perhaps I'll leave you to be the judge. BTW, the mid section is the old stuff.
There is another difference between old and new that will not be immediately apparent. The basing uses a different material - the old basing is perspex from an old shower screen, alas, now all used up. Old shower screen, now, those were the days......


 Then I painted the lot with acrylics, acrylic ink, and household emulsions. I added a few patches of flock for more texture and colour - Bob's your uncle, 3 foot of generic 16th to mid 19th Century earthworks.
12 comments:
James. Great stuff as usual.
Just to let you know, two people independently mentioned your blog to me in conversation (about the quality of your painting / scenery etc.). They are not official followers but are regular visitors. Thought you'd like to know.
That is very nicely done! It would have taken me a bit to find the "old" section!
Very neat. I shall nick the Das idea, to make a Roman marching fort.
Wonderful tutorial and sounds easy to do. You should write it up as an article for the new Miniature Wargames and get paid for it. They pay fairly well for articles and you can use the funds to buy more lead
BTW, if you ever want to start the AWI I be happy to make a sweet deal on the metal as I'd like to see how you would handle the wargaming of it n
Jim
Greate work ! Thanks for a very unsefull tutorial !
best regards Michael
A great tutorial and a very good result!
The ridge looks a bit rampant to me but a great paintjob anyway.
Thanks for sharing it!
Cheers
Monty
Those look really lovely... Could not have done better (well guess I would have done rahter worse)!
Nice stuff. I am envious.
Nice tutorial and they look like a pretty good match.
Excellent work! Always interesting to see how other folk tackle these sort of jobs. Very useful ans, as you say, cheap too!
Nicely done.
Thanks for posting details.
Tony
James,
Excellent tutorial. I learn something new every time I visit your blog. For everyone, if you go to his modeling and conversions subject list he has many articles on a lot of subjects including how he paints his figures. Its tucked way down in his blog, but worth it! I printed it out as a reference. He also has one on painting vehicles using his 3 shades of color technique. Well worth the effort!
Respectfully,
Gunny
Post a Comment